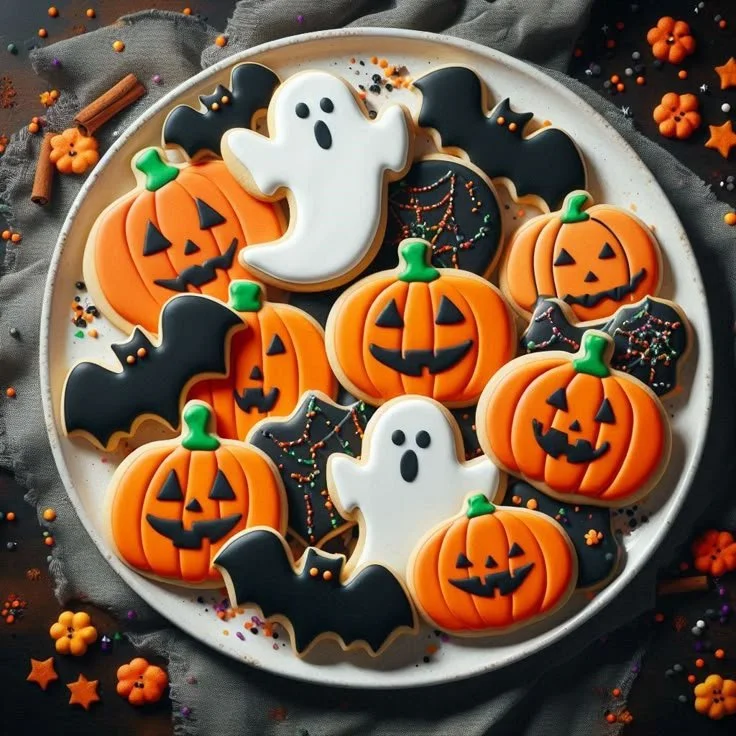
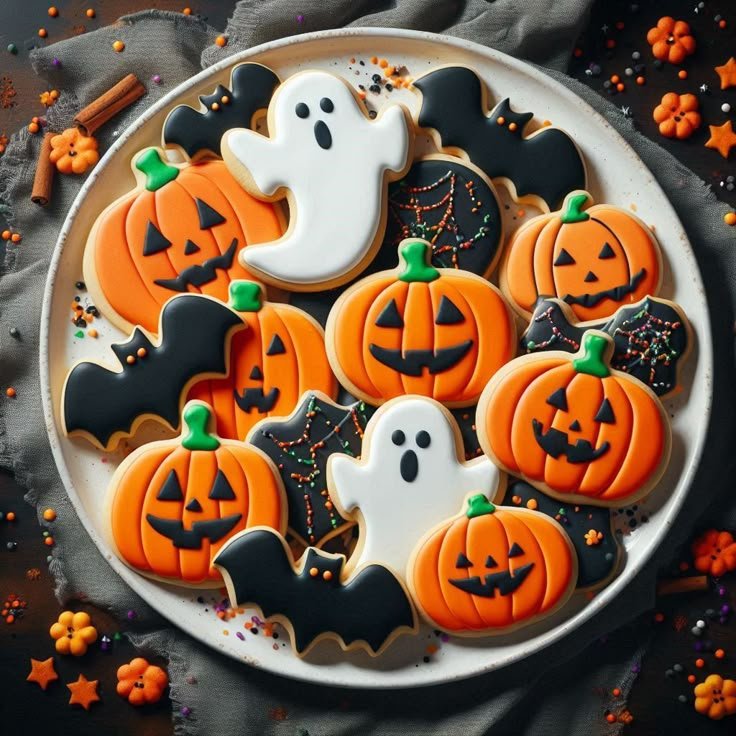
Making Halloween Sugar Cookies is a delightful way to add some sweet charm to your festive celebrations. With their vibrant colors and spooky designs, these cookies are a hit with both kids and adults alike. Plus, they are easy to make, offering a fun baking activity during the Halloween season that everyone will enjoy.
Why You’ll Love Halloween Sugar Cookies
- Fun for All Ages: Decorating these cookies can be a joyous family or party activity. Everyone can join in, making memories together.
- Customizable Designs: You can let your creativity shine with spooky shapes and colorful frostings. From ghosts to pumpkins, the options are endless!
- Soft and Chewy Texture: These cookies strike a perfect balance between soft and chewy, providing a satisfying bite.
- Perfect for Sharing: Pack them in cute boxes or bags for treats; they make thoughtful gifts for friends, coworkers, or neighbors.
- Easy to Make: With straightforward steps and common ingredients, even beginner bakers can whip them up without difficulty.
Recipe Overview
- Prep Time: 30 minutes
- Cook Time: 10-12 minutes
- Total Time: 40-42 minutes
- Servings: 24 cookies
- Difficulty Level: Easy
Ingredients You’ll Need for Halloween Sugar Cookies
- For the Cookies:
- 2 ¾ cups all-purpose flour
- 1 teaspoon baking powder
- ½ teaspoon salt
- 1 cup unsalted butter, softened
- 1 ½ cups granulated sugar
- 1 large egg
- 1 teaspoon vanilla extract
- For the Frosting:
- 4 cups powdered sugar
- 3 tablespoons milk (more if needed)
- 1 teaspoon vanilla extract
- Food coloring (orange, black, green, etc. for decoration)
How to Make Halloween Sugar Cookies
-
Preheat the Oven: Set your oven to 350°F (175°C) to ensure it’s hot and ready for baking.
-
Mix Dry Ingredients: In a bowl, whisk together the flour, baking powder, and salt. This helps to combine and aerate the dry components, ensuring even mixing later.
-
Cream Butter and Sugar: In a separate large bowl, cream the softened butter and granulated sugar using an electric mixer until it’s light and fluffy. This process incorporates air, giving your cookies a nice texture.
-
Add Egg and Vanilla: Beat in the egg and vanilla extract, mixing until well combined. The mixture should be smooth and creamy.
-
Combine Wet and Dry Ingredients: Gradually add the dry mixture to the wet ingredients, mixing until just combined. Avoid over-mixing to keep the cookies tender.
-
Chill the Dough: Cover the dough with plastic wrap and chill in the refrigerator for at least 30 minutes. This helps the dough hold its shape while baking.
-
Shape the Cookies: After chilling, roll out the dough on a lightly floured surface to about ¼ inch thick. Use cookie cutters to cut out your favorite Halloween shapes.
-
Bake: Place the cut-out cookies on an ungreased baking sheet and bake for 10-12 minutes or until the edges are just beginning to turn golden. Be careful not to overbake.
-
Cool the Cookies: Allow the cookies to cool on the sheet for a few minutes before transferring them to a wire rack for cooling completely.
-
Prepare the Frosting: In a medium bowl, mix powdered sugar, milk, and vanilla extract until smooth. Adjust the thickness by adding more milk if necessary.
-
Decorate: Once the cookies are completely cool, use food coloring to tint the frosting as desired, and frost your cookies in fun Halloween designs.
Tips for Success
- Use Room Temperature Ingredients: Let the butter and eggs sit at room temperature for easier mixing.
- Don’t Skip Chilling: This step is crucial for maintaining the cookies’ shape during baking.
- Experiment with Texture: For chewier cookies, bake a minute less. For crisper cookies, bake a minute more.
- Piping Bags for Frosting: Using piping bags can help create cleaner and more defined decorating lines.
Easy Variations
- Spice Up the Dough: Add 1 teaspoon of cinnamon or nutmeg to the dough for a warm flavor.
- Chocolate Version: Substitute ½ cup of flour with cocoa powder for a chocolatey twist.
- Gluten-Free Option: Use a gluten-free flour blend in place of all-purpose flour.
- Almond Extract: Swap vanilla for almond extract for a different flavor profile.
What to Serve with Halloween Sugar Cookies
- Milk: A classic pairing that enhances the sweet flavors of the cookies.
- Hot Chocolate: The rich cocoa flavor complements the sweetness well.
- Scoops of Ice Cream: Add a scoop of vanilla or pumpkin spice ice cream for a delightful dessert.
- Pumpkin Pie: For a festive theme, serve alongside slices of pumpkin pie.
Storage and Reheating
- Refrigerator Storage: Store cookies in an airtight container at room temperature for up to one week.
- Freezer Storage: Freeze in a single layer, then transfer to a sealed bag for up to 3 months. Thaw at room temperature before decorating.
- Reheating: Warm cookies in the microwave for a few seconds for a fresh-baked feel.
Common Mistakes to Avoid
- Not Chilling the Dough: Skipping this step can lead to cookies spreading too much while baking.
- Overbaking: Cookies should be set around the edges but soft in the center for the best texture.
- Incorrect Oven Temperature: Make sure your oven is accurately calibrated to avoid under or over-baking.
Halloween Sugar Cookies: Background & Cultural Inspiration
Halloween cookies have roots in ancient traditions, where baked goods were often used in celebrations surrounding the harvest and changing seasons. The act of baking decorated cookies has become a beloved modern ritual, focusing on creativity and community. This tradition varies by culture, from festive treats shaped like autumn leaves to ghostly figures, making sugar cookies a versatile choice in many Halloween festivities.
Frequently Asked Questions
Can I use margarine instead of butter?
Yes, margarine can be used, but it may affect the texture slightly. Cookies may be less flavorful.
How can I make the frosting thicker?
Add more powdered sugar to the frosting until you reach the desired consistency.
How long can I decorate the cookies ahead of time?
You can decorate the cookies 2-3 days in advance, as long as they are stored properly in an airtight container.
Can I use other shapes for the cookies?
Absolutely! Use any cookie cutter that matches your theme, such as bats, witches, or candy corn.
What if my cookies spread too much in the oven?
This can happen if the dough is too warm. Ensure that the dough is adequately chilled before cutting and baking.
Final Thoughts
Making Halloween Sugar Cookies is not only a fun baking project, but it also allows you to express your creativity. With soft, chewy cookies decorated in festive designs, this recipe is perfect for sharing with friends and family. Give it a try this Halloween season; you’ll find that these delicious cookies are worth every moment spent in the kitchen!
PrintHalloween Sugar Cookies

Delightful sugar cookies perfect for Halloween festivities, customizable with spooky designs and vibrant colors.
- Prep Time: 30 minutes
- Cook Time: 12 minutes
- Total Time: 42 minutes
- Yield: 24 cookies
- Category: Dessert
- Method: Baking
- Cuisine: American
- Diet: Vegetarian
Ingredients
- 2 ¾ cups all-purpose flour
- 1 teaspoon baking powder
- ½ teaspoon salt
- 1 cup unsalted butter, softened
- 1 ½ cups granulated sugar
- 1 large egg
- 1 teaspoon vanilla extract
- 4 cups powdered sugar (for frosting)
- 3 tablespoons milk (more if needed)
- 1 teaspoon vanilla extract (for frosting)
- Food coloring (for decoration)
Instructions
- Preheat the oven to 350°F (175°C).
- Mix the flour, baking powder, and salt in a bowl.
- Cream the butter and sugar until light and fluffy.
- Add the egg and vanilla extract, mixing well.
- Combine the dry and wet ingredients until just mixed, avoiding over-mixing.
- Chill the dough covered in plastic wrap for at least 30 minutes.
- Shape the cookies using cookie cutters on a floured surface.
- Bake for 10-12 minutes until edges are lightly golden.
- Cool the cookies on a wire rack.
- Prepare the frosting by mixing powdered sugar, milk, and vanilla.
- Decorate the cooled cookies with tinted frosting as desired.
Notes
For best results, use room temperature ingredients and do not skip chilling the dough.